Showing posts with label Crafts. Show all posts

Sunday, May 19, 2024

Duct Tape Dinner

My daughter used to love making bags and purses out of duct tape years ago.  I recently came across one of them as I was spring cleaning, and it gave me the idea of hosting a duct tape themed dinner.  There are so many creative things you can do with duct tape, so it made crafting the party details super fun.


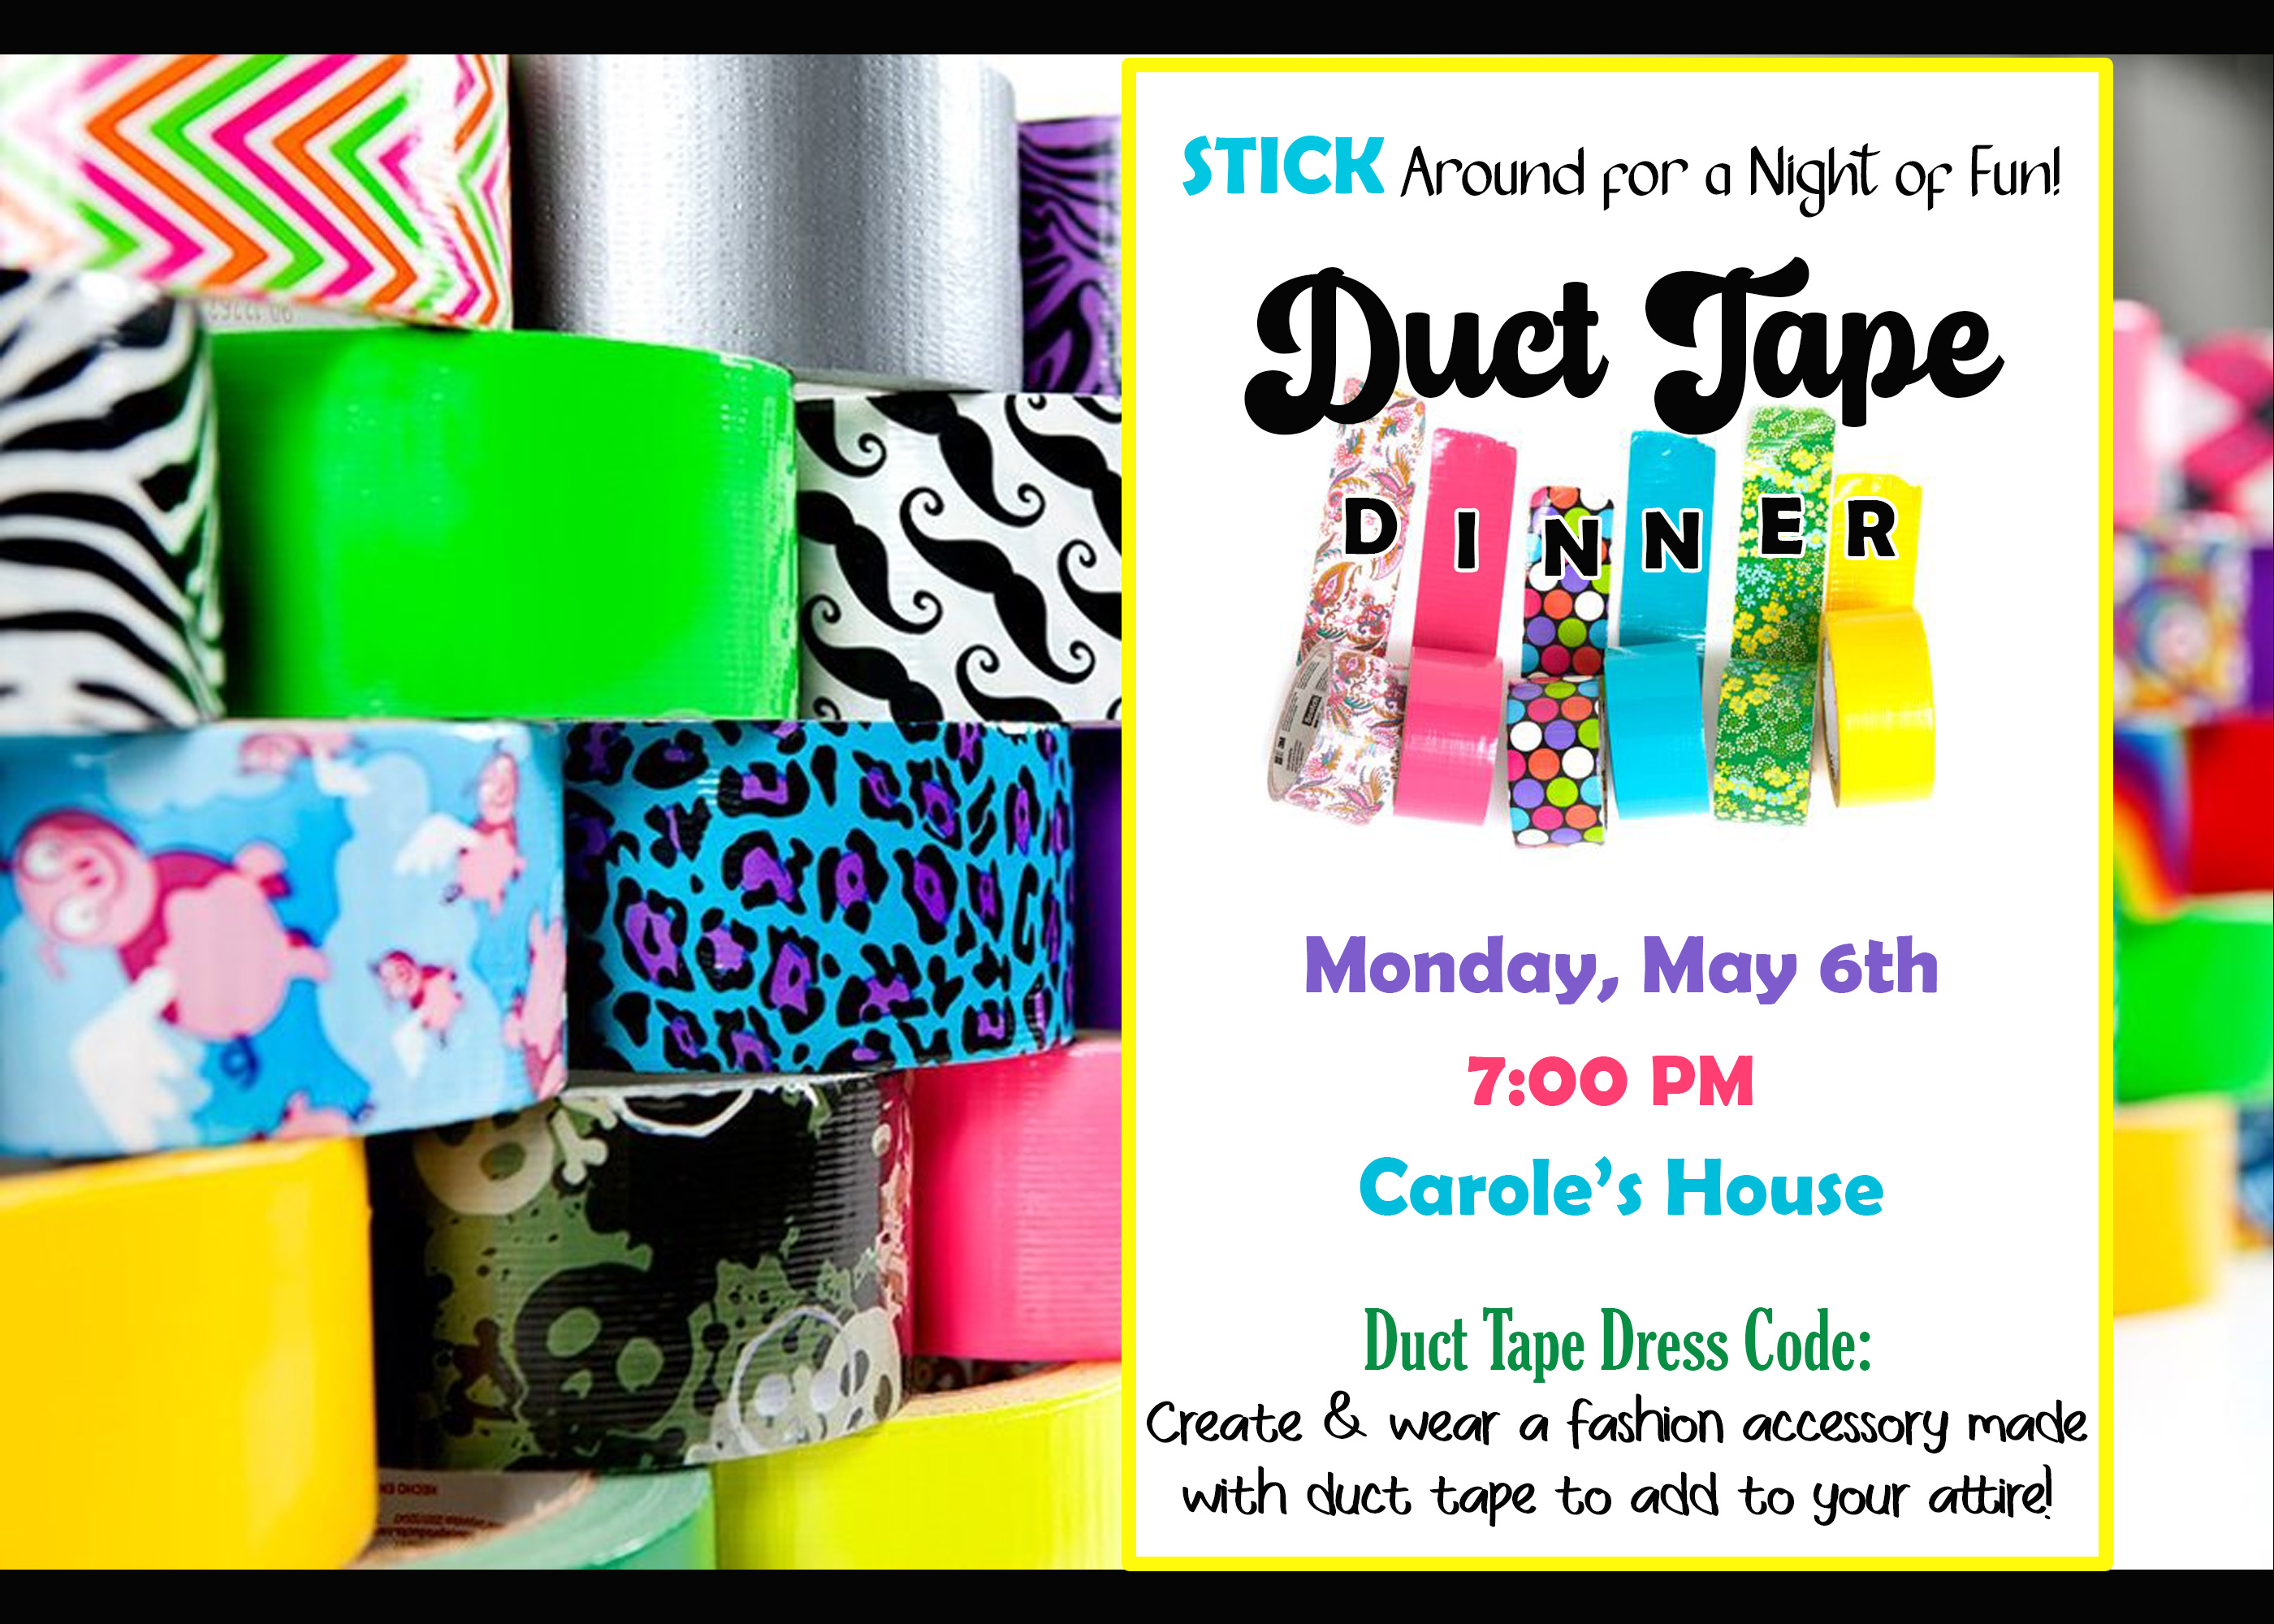
Invite: Found the image of colorful rolls of duct tape online and crafted my invitation around that.  Invited guests to "stick" around for a night of fun, and the evening really did turn out to be a lot of fun catching up with my best girl friends.  


One fun aspect of the party, was that I asked guest to arrive with an accessory made out of duct tape.  We had hair bows and flowers, and many guests had earrings or bracelets.  There are a ton of tutorials online for all kinds of things from easy to more time consuming.  It think it only took me about 5 minutes to make my braided bracelet.


Decorations: 
Of course the decorations were either made with duct tape or were duct tape rolls.  For the table, I took a plastic light blue tablecloth I already owned added stipes of colorful duct tape down the middle that I purchased from Amazon.


For the centerpiece, I made roses out of duct tape.  I used plastic straws as stems that I wrapped with green duct tape, but I would suggest using pencils instead.  Maybe because I used bendy straws, but the roses were not as strong as I think I would have liked.  I followed a tutorial for making these on Pinterest.  I rounded the edges of mine.  Some tutorials don't have you do that as it was an extra step, but I think it made them look more like real roses.  I added duct tape around the vase, and placed a couple rolls of duct tape leaning up against the vase as well.


I also made bowls out of rolls of duct tape to hold small snacks.  To make the bowl, I cut a piece of duct tape that fit across the roles diameter.  Then I flipped the roll over and placed a cupcake liner inside the roll.  The duct tape held it in place and the cupcake liner helped the snacks stay inside.  


I served light snacks: goldfish, M&Ms, chex mix, Reeces Pieces, chocolate covered pretzels, and chocolate covered almonds.  If you stack the rolls, make sure some of the heavier snacks are not the bottom.


For place cards, I printed the guests names on card stock and then decorated each edge of the folded place card with patterned duct tape I already owned.  I tried to think of creative duct tape related slogans to put before each guest's name.  Some examples were: Duct Tape Diva (name), Sticky Situation Solver (name), Adhesive Admirer (name), Stick Together Champion (name), Wrap Star (name).


I used another patterned duct tape for napkin rings.  I cut toilet paper rolls the height of the duct tape and then wrapped it with the duct tape so the napkin could slide out easily and not be ruined.


For wine charms, I used various colors of duct tape to make flags.  Simply wrapped the tape around the stem, lined up the edges and stuck them together. and then cut a wedge at the end.


I designed my wine labels on Photoshop to match the theme as well.  For the white wine, I created the saying, "Stick with Wine: The Duct Tape of Life" and photoshopped the two of the rolls of duct tape from my party invitation around the stem of a white wine glass.  The background behind the middle image was standard grey duct tape with added photoshop details.  For the red wine, I found the saying online, "Wine is like duct tape, it fixes everything" and created a label around that slogan.


Above the beverage/appetizer table, I also make a simple banner with duct tape and string.  Took me no time at all to make.  For my HOME sign, I replaced the O with two rolls of duct tape.


Menu:
As usual, I tried to incorporate the party theme into my menu as well.  We started with chips and salsa which I called an Adhesive Appetizer.  I served the salsa in a ramekin that fit in the center of a large roll of duct tape.


For the main dish, I served Wrap & Roll Burritos.  Guests put what fixings inside their burrito they wanted, wrapped and rolled them up, and then I grilled them to get the outsides crispy.  I served: ground beef, cheese, refried beans, black beans, tomatoes, lettuce, sour cream, olives, and guacamole.  I made flags like the wine charms on toothpicks for guests to use to mark their burrito.  That way they didn't get mixed up when I was grilling them.


With the burritos, I made Sticky Cilantro Lime Rice.  I've made this for multiple dinners and it is always a crowd favorite.


I went easy with the dessert and purchased a Cinnabon Cinna Ring which is a ring of pastry topped with Cinnabon's famous cream cheese frosting. I designed a label "Duct Tape Dessert" for the middle to make it look similar to a roll of duct tape.  I usually hand make all aspects of the meal, but it was nice this time to just have a dessert already done as it just needed a quick heating up.


Activity/Craft:
With May being the month of Memorial Day, I decided to have a craft that guests could make while we chatted and waited for everyone to arrive.  


We made patriotic wreaths out of duct tape.  I bought the red, white, silver, and blue duct tape at the Dollar Tree.  The flag duct tape I purchased from Walmart, and the 12" foam rings I purchased from Joann's.  I found the idea for this at DIY Candy.  Duct tape is so sticky, this wreath is definitely a challenge and you have to be okay with wrinkles, but when it's finished, it is really cool looking.


Favor:
 As a parting gift, I used a raisin box that I covered in colorful duct tape.  I emptied out the raisins and cleaned the inside of the box to get rid of the raisin smell, and then I filled the box with M&Ms. Why a raisin box you ask? No reason other than I wanted that size of box & I didn't want to spend a ton of money and raisin boxes are cheap. I used the owl duct tape from the napkin rings and a solid yellow duct tape for one pattern.  The other was the patterned duct tape from the place cards with a solid orange duct tape. I painted a small clothespin for the top and made a tag that read: "Thanks for being like Duct Tape - Strong & Reliable."

This was a fun theme to work with, and if you are crafty, it is pretty easy to pull off. Hope you enjoyed this post and try a duct tape party of your own with some of these ideas!


Sunday, December 11, 2022

Chillin' with my Gnomies

Gnomes are all the rage right now, and why not? They are so cute!  I decided to theme our December monthly dinner around gnomes with a Chillin' with my Gnomies party!  This was super fun to create & we had a blast eating our gnome-themed food, painting our gnome craft, and of course hanging with our gnomies to catch up.


Invite: 
Since this was a holiday party, I designed the invitations with red, green, and white as the accent colors.  I purchased a design of a gnome on Etsy, and after getting permission from the designer, I used this same gnome on much of my party decorations including the invitation.


Decor: 
I purchased a few items for this party, but most of the amazing gnomes I borrowed from friends.  For the dining table, I used two snowflake decorations I already owned as the centerpiece along with lots of gnomes.  The cute MERRY gnomes were borrowed.  The two gnomes on the each end of the centerpiece were wine bottle covers that I purchased from Amazon in a 4-pack and just placed these two on pint glasses.


For a place card, I used the gnome from my invitation, and just added each guest's name to the beard.  Instead of napkin rings, I folded a green paper napkin into a hat to add to the place card.  Easy and cute.


For my beverage and favor table, I borrowed these amazing gnomes for the table and the mantle.  I love them so much, and they really added to the decorations.


The beverage and favor table.


Instead of designing wine bottle labels, I purchased these gnome bottle covers from Amazon to use.  As stated above, they were a 4 pack and I only needed two for wine, so the other two created gnomes for my centerpiece.


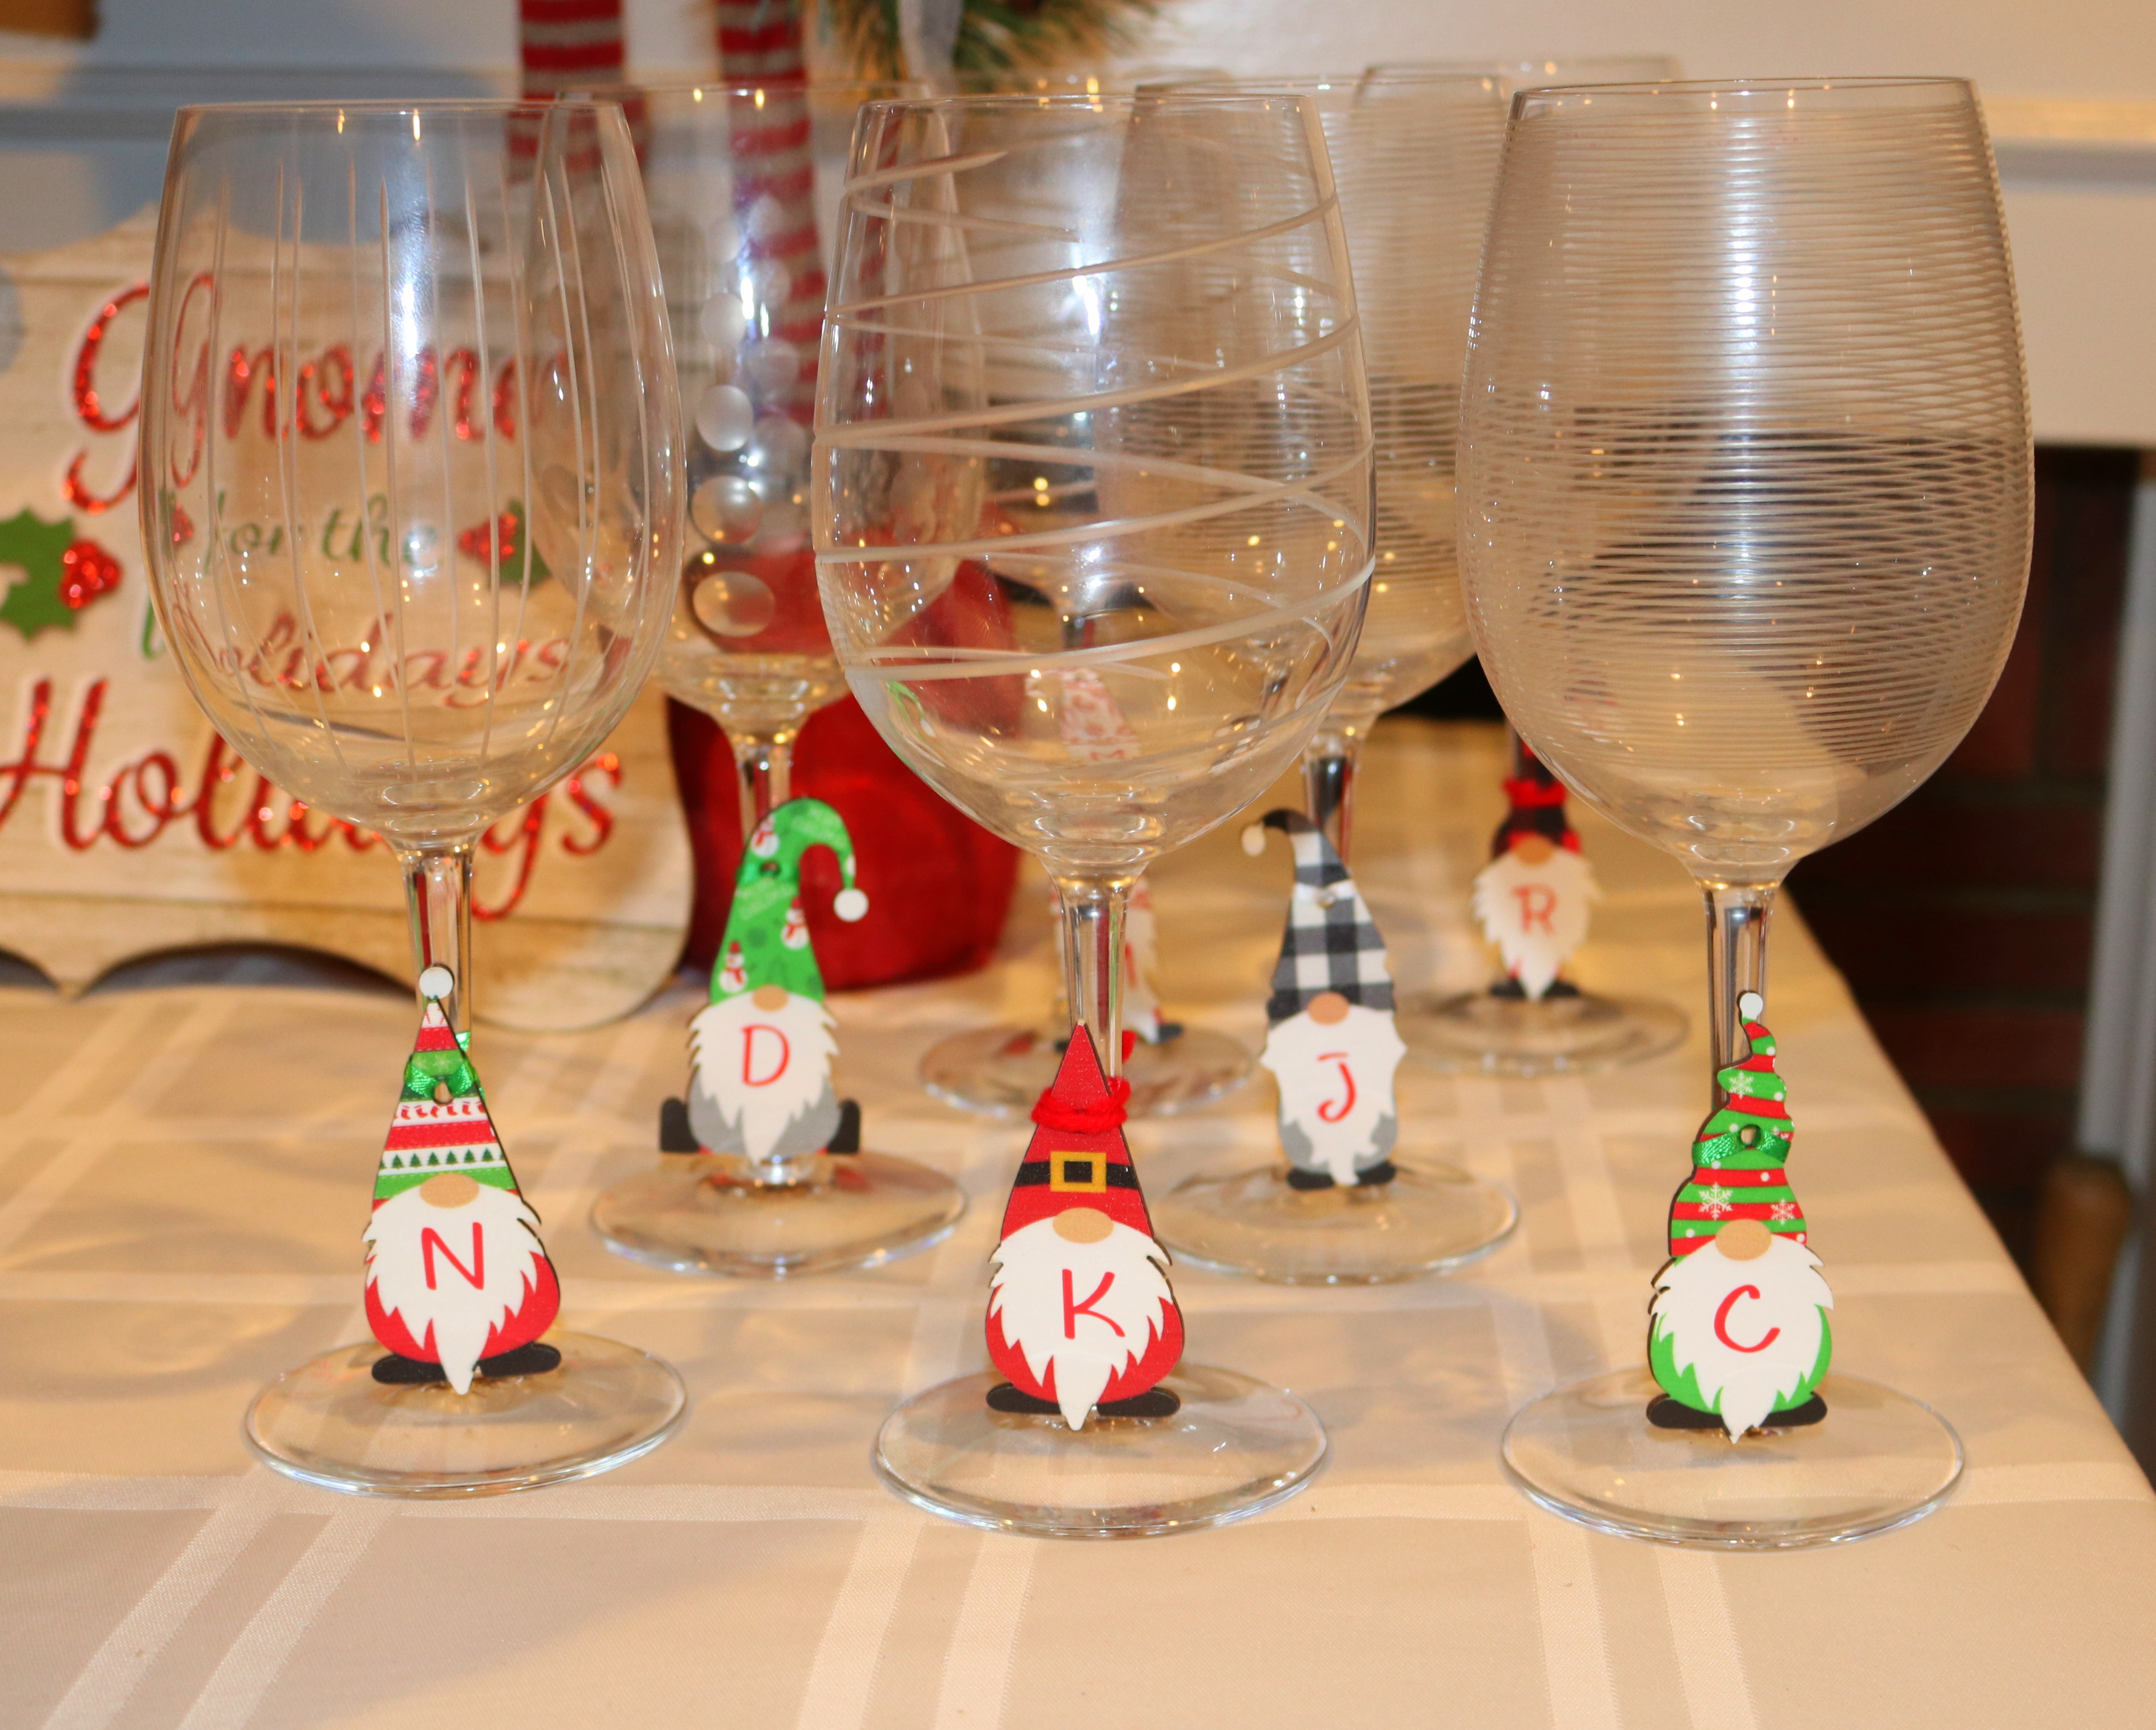
For wine charms, I purchased these small wooden gnomes from Amazon. I was originally planning to use them as place cards, but when they arrived and were smaller than I anticipated.  I decided to use them for wine charms instead.  I used my Cricut to put the first initial of each guest on the beard.


Outside, I borrowed this blow-up gnome for my front yard to welcome guests to the party. 


Menu:
  Turns out, the only gnome food ideas I found online were desserts, so I had to invent my own meal. We started with a Gnome Garden (Salad).  I cut radishes to look like mushrooms.  On top of the green spinach, I added garbanzo beans, feta cheese, and pecans. Guests could choose either an Italian dressing or a Balsamic Vinaigrette.


I decided to make Gnome-made giant meatballs wrapped in bacon along with mashed potatoes for the main meal.  Although they don't look amazing, my attempt was to have each one look like a gnome head and beard.  I made mini party hats with holiday cardstock to place on top.  For this dinner, I used ground turkey instead of ground beef.  I think the balls would have stayed a bit more round with beef, as the turkey was harder to shape into a ball and flattened a bit in the oven.  For the nose, we just used garbanzo beans.


I made these holiday gnome cupcakes for dessert.  I dipped the waffle cones in red candy melts to give it a little something.  The beard, nose, and green body is gnome-made frosting.


Party Activity: At our December monthly dinners, I always like to have some sort of craft for us to do.  I wanted to make it a simple one that could be done in a short amount of time, so I opted for painted wooden gnomes.  Love how they came out.


My husband cut all the 2x4 pieces of wood before the event.  They were around 10" tall and sanded. I couldn't find wooden circles at the craft store, so I bought brown/tan pom poms to use for the noses.  For the beard, guests could choose from craft fur or a white mop.  The mops are from the dollar store and each mop can make a ton of these gnomes.  The craft fir can make a few gnomes, but is more expensive.  Some guests made eyebrows for their gnome, some did not.


Our first finished gnome of the evening.


Love this spirited gnome my friend painted for her young daughter.  She even painted the mop strands of the beard slightly.

Forgot to get a group photo at this dinner, but we had a great time together to close out our last monthly dinner for 2022.


Wednesday, June 9, 2021

Get Ready to ROCK!

After over a year of monthly dinners on Zoom because of the pandemic, we were finally able to meet in person!  I cannot tell you how happy it made me to be able to sit around the table with my girlfriends and chat, laugh, and interact like we did before the pandemic.  

At the beginning of the pandemic last March, my daughter and I began painting rocks to decorate our yard and place around the neighborhood for others to enjoy.  I thought this would make a fun craft to do during a monthly dinner, so I have been waiting to do this theme until our monthly dinner group could begin meeting in person again.  This month was the time! So...let's get ready to ROCK!


Invite:
 
I put together the monthly dinner invitation on Photoshop with images I found online.  I used a font that looked like paint to match the theme.


Decor:
I kept the table very simple and craft-friendly.  I used a cheap plastic tablecloth so that if paint dropped on it, it wasn't a big deal. The centerpiece was just the craft supplies we would need for the fun.  This included a basket of various paint colors, a paint can with brushes, a tray of paint markers, and a glass bowl with rocks to choose from.  I also added some rocks that I painted to the table.


I used bright pink napkins for a fun pop of color.  I added a small paint palette and paintbrush to the top of the napkin and tied a ribbon around all 3.


I was originally planning to paint a rock specifically for each guest and use it as a placecard, but I ran out of time.  Instead, guests drew another guest's name from a paint can when they arrived, and they spent the first bit of the party designing a rock for that person.  It was sweet to see what the girls came up with.


With summertime approaching, I decided to serve a simple drink "on the rocks" for guests.  I went with a low calorie and refreshing drink that mixes a shot of Smirnoff pink lemonade with Lemoncello La Croix.  I painted a lemon-themed rock to place next to these ingredients.  This might be one of my go-to drinks for the pool this summer.


I also served red and white wine, and tied them to the theme with the wine labels I created.  I loved the pandemic mask of a wine glass rock!  Cracked me up.  I also painted a rock with a wine theme to place next to the bottles of wine.


Menu:
I wanted all my menu items to keep with the rock theme.  I painted rocks to go with each dish, but also wanted the rocks to be silly/fun to add to our painted rock garden.


For an appetizer, I started with a pepper jack cheese ball that I shaped like a rock.  I called it the Pepper Jack Cheese Rock with "Boulder" Flavor. The recipe calls for some of the shredded cheese to be reserved to roll the ball in, but I put all the cheese inside the ball and crushed blue corn tortilla chips to coat the cheese ball with to give it more of a rock color/look.  This cheese ball was easy to make and very tasty.  It was polished off quickly by all of us.